Are you thinking about harnessing the sun’s power for your home?
That’s a great idea! This guide is here to show you the way. The installing process of solar panels might seem like a big job, but don’t worry. We’ve broken it down into simple steps.
By the end, you’ll see it’s something you can do with the right tools and patience. Let’s get started!
Roof Assessment
Before starting, it’s vital to assess your roof’s condition. Look for any damage or areas that need repair. Also, check the roof’s age – older roofs might need replacement before adding solar panels.
Next, examine the roof’s orientation. South-facing roofs catch more sun, making them ideal for solar power.
If your roof faces east or west, don’t worry. These orientations can still harness solar energy, though not as optimally.
Lastly, think about the roof’s slope and material. Most solar panels fit well on slopes between 15 and 40 degrees, and materials such as asphalt shingles, wood, metal, or concrete tiles.
Material Gathering
Now for the fun part – collecting all the things we need! First on the list are the solar panels. These come in many sizes, and the size you need depends on how much power you want to create.
You will also need an inverter. This device changes the power from the sun into electricity for your home.
Brackets and mounts are often used to attach the panels to your roof. And we shouldn’t forget nuts, bolts, and wiring to connect everything.
Lastly, safety gear is a must. This includes a safety harness and helmet. Be sure to gather all materials before starting.
Safety Precautions
Safety is a top concern during solar panel installation. First, always wear your helmet and safety harness.
Accidents can occur when you least expect them. Safety gear is there to protect you from harm.
Next, use rubber gloves and boots. They offer an added layer of protection, especially when working with electrical components.
It’s also critical to use the right tools for the job. Using inappropriate tools can lead to accidents.
Frame Assembly
Next up is putting together the frame for your solar panels. First, attach your brackets to the panels using nuts and bolts. Ensure the brackets are firm and secure.
Then, attach the mounts to your roof. Be careful to place them where you’ve marked them during your roof assessment. Once you have your mounts in place, you can now attach the solar panel frames to them.
Take your time to ensure everything aligns correctly and is secure. Use your tools wisely and handle the frames gently to avoid causing any damage to your new solar panels.
Solar Panel Placement
Next comes the exciting part – placing the solar panels. With your frames secured, it’s time to bring in the stars of the show.
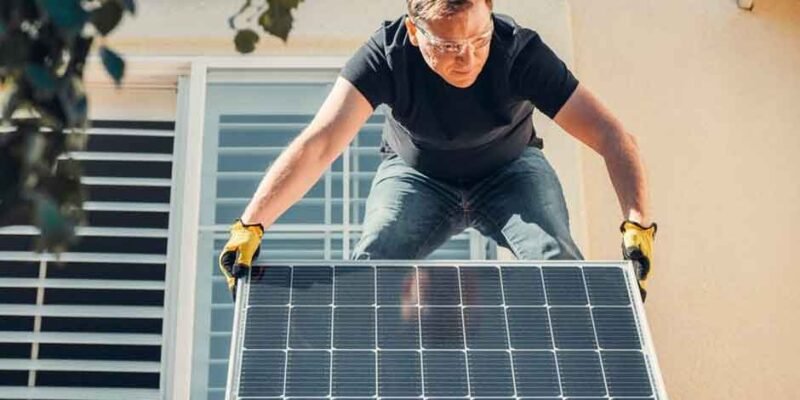
Lift each panel onto the roof with the help of a partner. Be careful during this process to prevent any damage.
Once on the roof, align each panel onto its frame. Use nuts and bolts to secure the panels firmly to the frames. It’s crucial to double-check that the panels are sturdy and won’t shift or wobble.
After placing all panels, connect them using the wiring. Make sure that all connections are tight and safe.
Electrical Wiring
The solar panels are in place, and it’s time to link them up. This step is all about making sure the power from the sun can flow into your home.
Start by switching off the main power to your house. Safety comes first! Now, carefully follow your solar panels’ manual to connect the wires.
The positive wire from your panels (usually red) connects to the positive terminal on your inverter. The negative wire (usually black) goes to the negative terminal.
After connecting and securing all wires, you can switch the main power back on. With this, your solar power system is ready to harness the sun’s energy!
Inverter Installation
The inverter’s job is crucial. It turns sunlight power into electricity that your house can use. Let’s jump in and get it installed!
First, find a good spot for your inverter. A cool, shady place is best. Too much heat can harm the inverter.
Once you have the spot, attach the inverter to the wall. Use a drill and screws to secure it.
Next, it’s time to link the inverter with the solar panels. The wires from the panels connect to the inverter. The red one goes in the positive terminal, and the black one in the negative terminal.
Now, connect the inverter to your home’s power supply. Make sure all wires are secure and you’re good to go.
Connection Testing
Testing the connection is the final step before you start enjoying the benefits of solar power in your home. It’s a quick process that gives you the confidence everything got installed correctly. With your solar power system set up, you’ll switch off the main power supply one more time.
Next, you’ll turn on the inverter. Look for a green light on the inverter. This light gives you a thumbs up that power from the solar panels is flowing into the system correctly.
If it’s not green, dig into the user manual or call a professional for help. After this step, you can switch the main power supply back on. With that done, you’re now ready to benefit from the sun’s energy.
Maintenance Tips
Taking care of your solar panels is key to ensure they last a long time and work efficiently. Cleaning them is a simple task, done twice a year in fall and spring. Use a soft brush and mild soap.
Avoid harsh cleaning products as they may damage the panels. For safety, always clean from the ground using a long handle brush.
Inspect the panels annually for any damage. Check for cracks, chips, or fading. If you find any damage, call a professional to fix it.
If you can’t do this on your own, you can always hire people for the job. Finding the best solar company to help you with installation and maintenance would be the best approach.
The Installing Process of Solar Panels: It’s Not That Complicated
The installing process of solar panels is a doable task. It might seem complex but with the right tools and patience, anyone can do it.
Each step, properly followed, leads to a successful installation. Enjoy the benefits of solar power in your home. Good luck with your solar journey!
Check out our other posts for more helpful guides and tips!









Comments