

There’s more to keeping your car clean than the odd weekend wash. For the best results, you’ll be digging into every nook and cranny to remove dust, grime, and smelly stains that not only look bad but can cause health issues too. Car detailing is on the rise, and though most car owners rely on a pro detailing service, there are hundreds of products that let you detail both the interior and exterior in your own time and without the huge bills that come at the end.
Why Are Regular Cleaning and Detailing Important?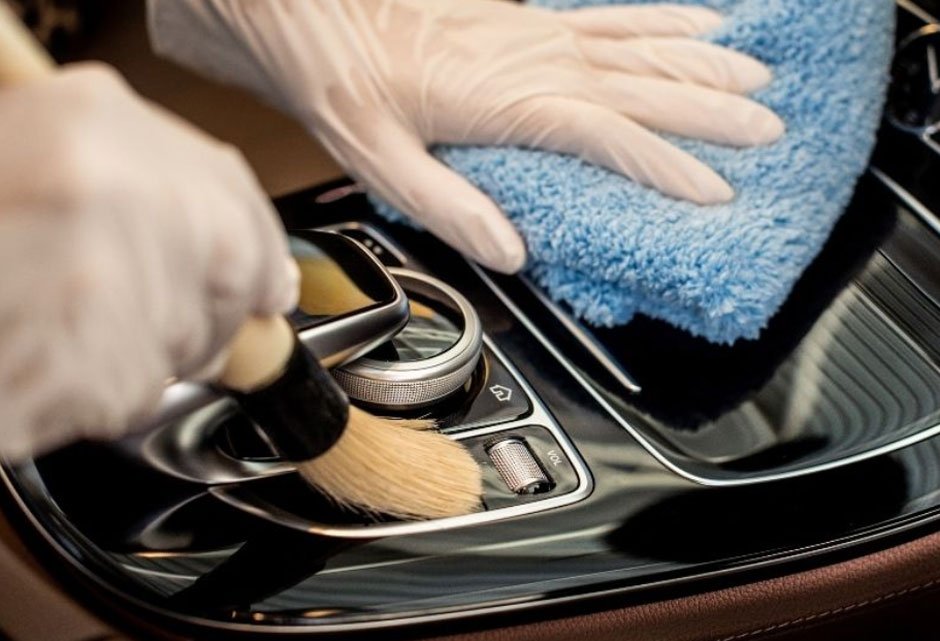
Maintaining the interior to showroom standards is only part of the equation. There’s a lot that dust, mud, grime, food stains and spilled drinks can do besides looking bad. They can get ingrained in the cloth and leather, damage the carpet underlay, and cause nicks and cracks in the plastic. And they negatively affect passenger and driver health.
Removing all dust, for instance, significantly improves air quality and prevents allergens, while dealing with stains and spills prevents the buildup of harmful bacteria, mould and fungi. There’ll be no bad smells, no unsightly surfaces, and no potential health issues. And when the time comes to sell, you can bet that a thoroughly detailed car with the right car interior detailing products will get you more in the back pocket.
So, why choose to detail your car yourself? First, you get to handpick the car interior care products. Yes, you’ll need a little background knowledge as to what can be applied to which materials, but there’s not much of a learning curve to get things right.
Second, you know every nook and cranny is dealt with, and the work is done to a standard that meets your expectations. After all, the interior is where you’ll be spending most of your time. There are no waiting lists, no lengthy drives to the nearest detailer, and you can schedule the job at your own pace.
Lastly, and perhaps most importantly, a single round of thorough detailing can cost hundreds of pounds, and this buys you a whole heap of detailing products for years to come.
How Do You Detail Your Car’s Interior?
There are a few steps to follow when you want to get all the nasties out and revive the inside of the car.
Get All Your Gear Together
Every job, including detailing, requires the use of the right tools and products. Perhaps the biggest cost is getting a decent dry and wet vacuum cleaner. If you already have one around, then most detailing depends on general-purpose surface cleaners, carpet stain removers, shampoos for the cloth, and cleaners and conditioners for leather trims and seats. These are applied (and removed) with a range of mitts, microfibre cloths, sponges, spray bottles and cans.
You can deal with delicate and hard-to-reach areas with brushes, dusters and swabs while handling finishing touches like windows with glass cleaner. To keep all surfaces looking good, use specialised or general-purpose protectants and add a dash of deodorizer and air freshener to repel smells.
Remove the Clutter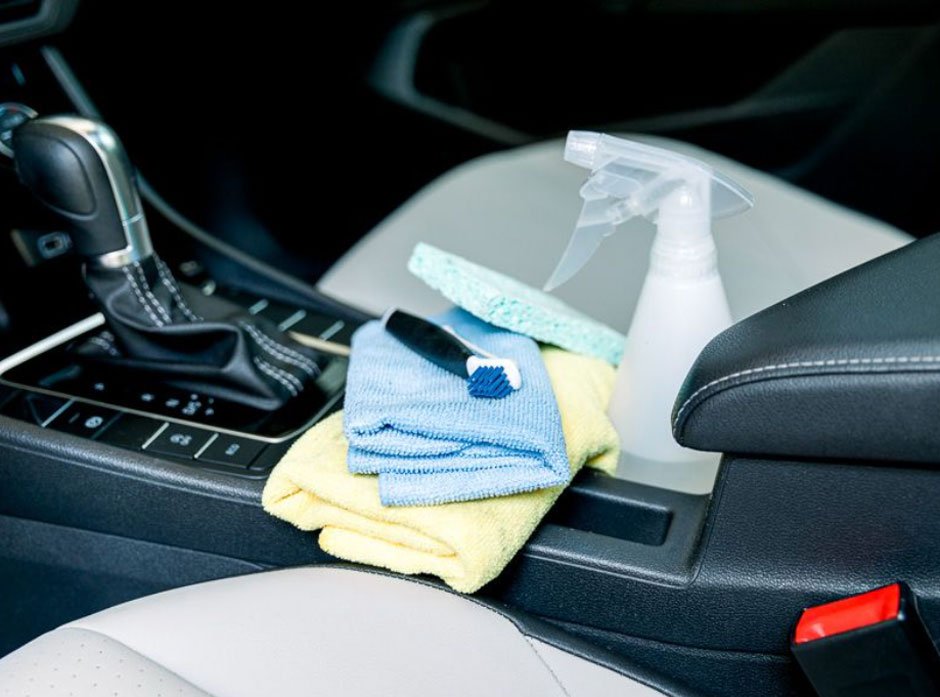
The obvious first step is cleaning the collected rubbish in and around the seats, door pockets, cup holders, glove box and other storage areas. Also, remove forgotten items, like kid’s toys, tissue boxes, coins and whatever doesn’t need to be there. Move around the back and do the same in the boot.
Start With the Floor Mats
Mats are good at picking up food scraps, dirt, mud, and any accumulated dust, so they will be the dirtiest. Take them out, give them a good shake, spray on some general-purpose cleaner if they’re rubber and let that soak in. Use a pressure washer or hose and hand them to dry. If you have carpet mats, apply carpet shampoo, let it sit, and vacuum. Stubborn stains can be removed with a stain remover. You can use a carpet brush for ingrained dust that’s hard to spot at first glance.
Vacuum the Seats 
The seats will take up more of your time. For thorough detailing, you can remove the seats to get to the areas that are under them and will bring up a few surprises. Or, you can just vacuum dust and grime, use the vacuum attachments for tighter areas around the rails, and use an all-purpose cleaner for more obvious stains. Be sure to move the seat back and front.
Also, consider using a hair brush to pick up human and pet hair.
If you have leather seats, apply a leather cleaner with a brush (to prevent damage to the top layers) while still letting the cleaner break up hardened contaminants. Follow up with leather protectant. For damaged patches and to protect against fading and UV damage, use a leather repair kit.
Do the Dash and Trim
This is where microfiber cloths come into the picture. What’s important is using the right cleaner for the materials. Dashboards can be a mixture of soft-touch plastics, vinyl, rubber, wood, metals or leather, so if in doubt, use a multi-purpose cleaner applied to a cloth. You can also use rubber or vinyl cleaner, wood polish and plastic protectant to patch up minor scratches.
Spray with a UV protectant, especially if you rely on street parking, rather than having the vehicle garaged. This prevents cracking and wrinkling. Move onto the centre console and the door trims, and use brushes or swabs to remove dirt lurking in the air vents.
Clean the Glass
Glass cleaner and a microfiber towel should get rid of dust, grease, fingerprints, and other contaminants on the windshield and windows. Don’t forget the rearview and vanity mirrors. If you have tinted windows, ensure that the window cleaner is appropriate.
The Final Touches
The wide range of car interior detailing products also extends to often-overlooked parts like the gear knob and sleeve, steering wheel and handbrake. Since most are made of leather, you’ll be using a leather balm or cleaner on a microfiber cloth to deal with ingrained dirt, grease and other nasties and revive shine and suppleness.
To bring back the new car, use a protectant appropriate for the materials. This again can be the all-purpose sort or specified for the material, and it adds a shielding layer that prevents dust buildup. It also adds a gloss or satin finish, depending on what you’re after. Finish up with spraying odour removers and air fresheners to remove unwanted smells and repel mould. Though not necessary, a final run with the vacuum should pick up forgotten bits.
Detailing is recommended at least once every six months, or sooner if your car gets more use. While you can use home cleaning products (albeit diluted), specialty car detailing products are cheap for what they offer, won’t risk damage to materials, provide better protection and undoubtedly have better looks. You can buy them separately or save some cash and go with bundled deals.


Comments